

In this Section...
Methods Applied to Orsten Fossils: Stereo Images
3. Stereo Images
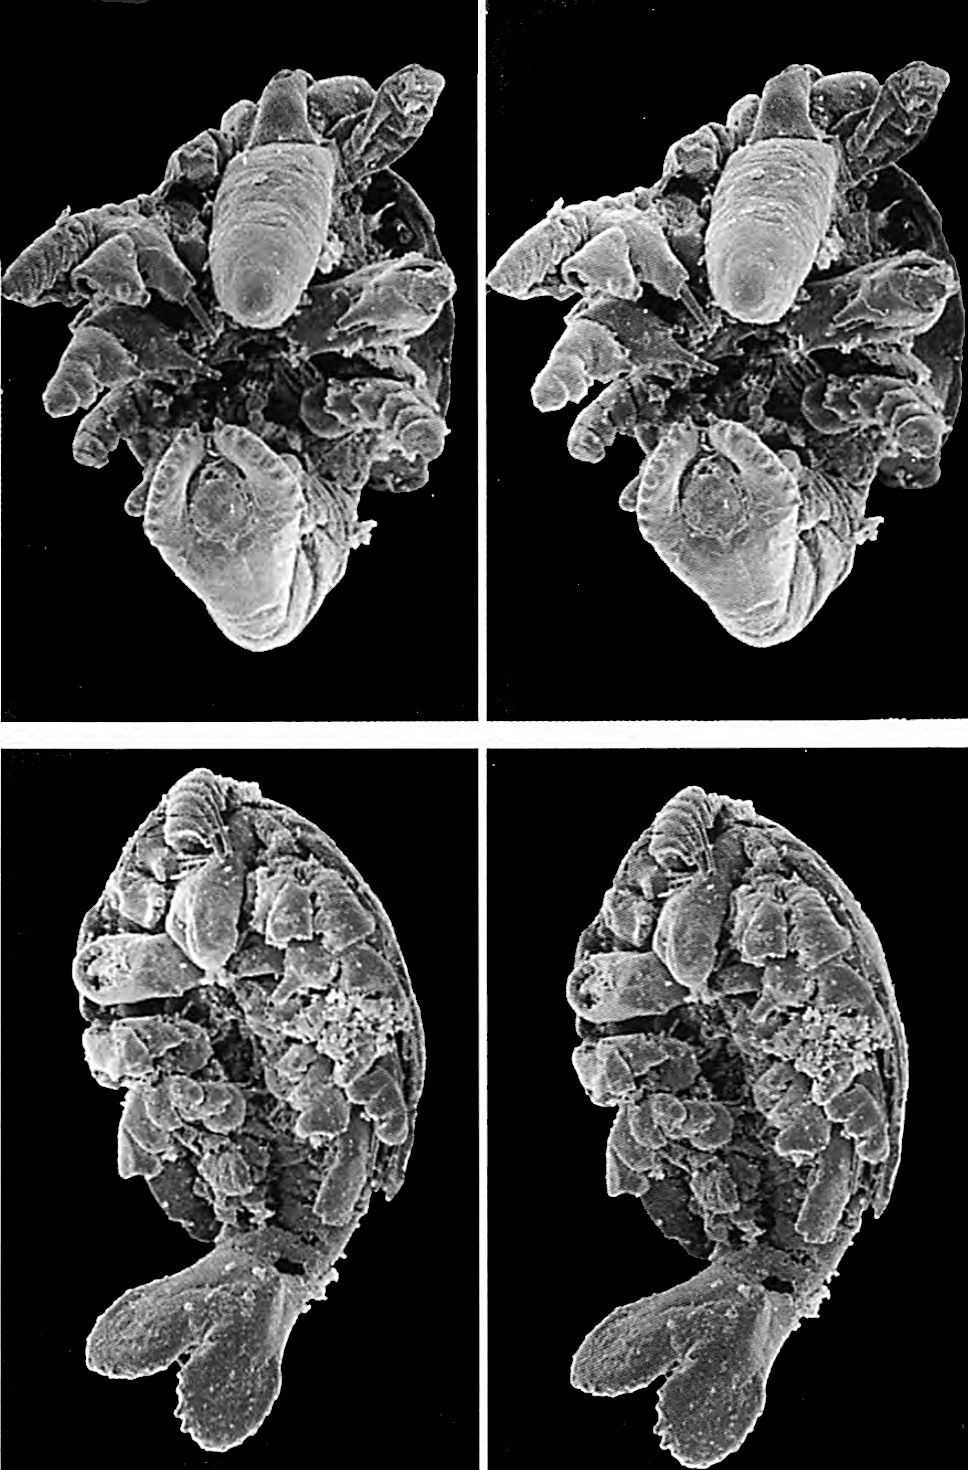
Already in the 1980s we had started to produce stereo images of our specimens. These were photographed at different tilting angles under the SEM and then combined to be viewed with special stereo spectacles. At that time it was fairly popular also to publish such stereo images, at least in the Palaeontology. The fixed angle at photography and fixed distance at combining the two images are, however, a problem for many people, who have problems to combine the images into a single stereo view when looking into the gap between the photographs. Point to point should be roughly 8–9 cm, but that does not work in the case of far-sighted people, me included. It should be noted that orientation of the objects is important as well as the relief. Our animals, arthropods or crustaceans, in particular have limbs that stick of from the surface, which diminishes the stereo effect. So, better a lengthwise oriented object than horizontally extended, a half sphere is as bad as a curved C. The very slim Skara was a bad object compared to others.
An easy way for presentation without special lenses, is preparing stereo images for use of red-green glasses. One can even use old pictures. Disadvantageous is that people with difficulties to distinguish these colours can't see the stereo effect. Yet, the method does not require complicated arrangements of the pictures next to each other. In both cases, black and white above and red-green – and it takes only a few minutes. Even more, the images can be pretty small to still show the stereo effect.
- 1. All you need for this easy way of having nice stereo images on your website is a program like Adobe Photoshop, a pair of stereo images and red-green spectacles. I have ordered some from a company on the Web, but you may get them in a toy shop too. Note that TV spectacles are useless because the colours are not suitable and you will not get a good stereo effect.
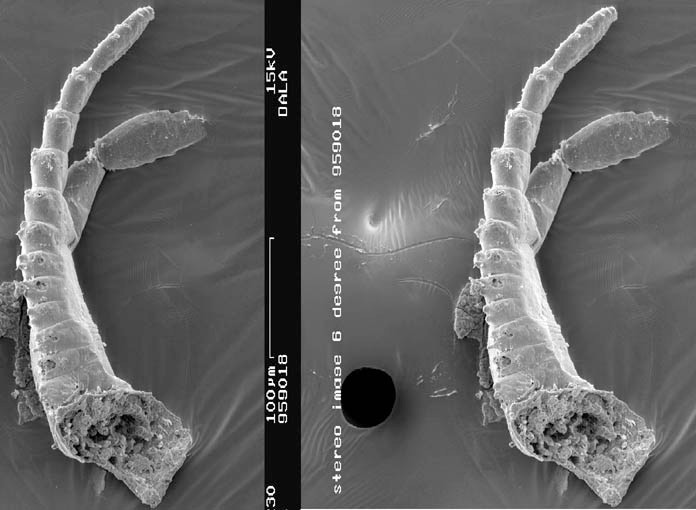
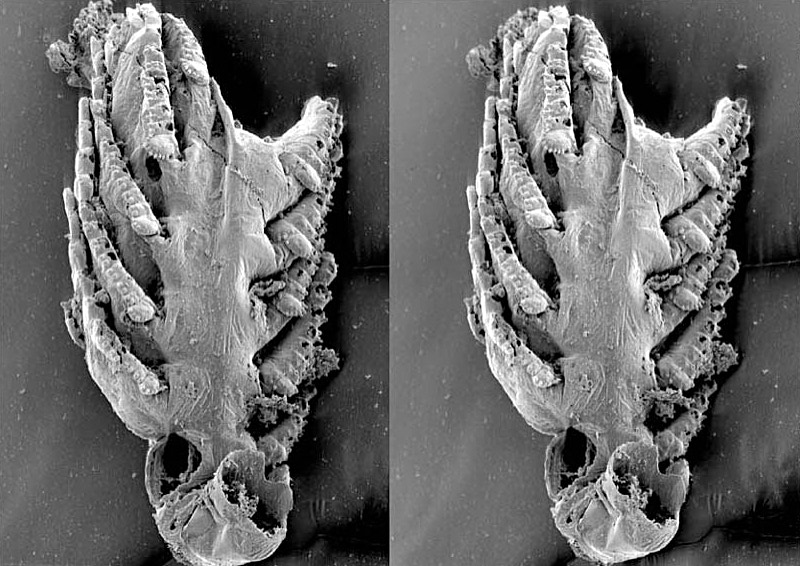
- 2. To start with, you can download these two stereo pairs of images. They don't fit too well, but are good for practising (the animal is called Dala peilertae and is a small Orsten crustacean, the pictures depict a trunk limb and a part of the trunk from ventral). Double-click on them to receive the larger versions and copy them to your computer. Then cut the images in a program like Adobe PS to have a left and right picture. That you have the left one left you can see by clicking on them. The left should be tilted against the other one.
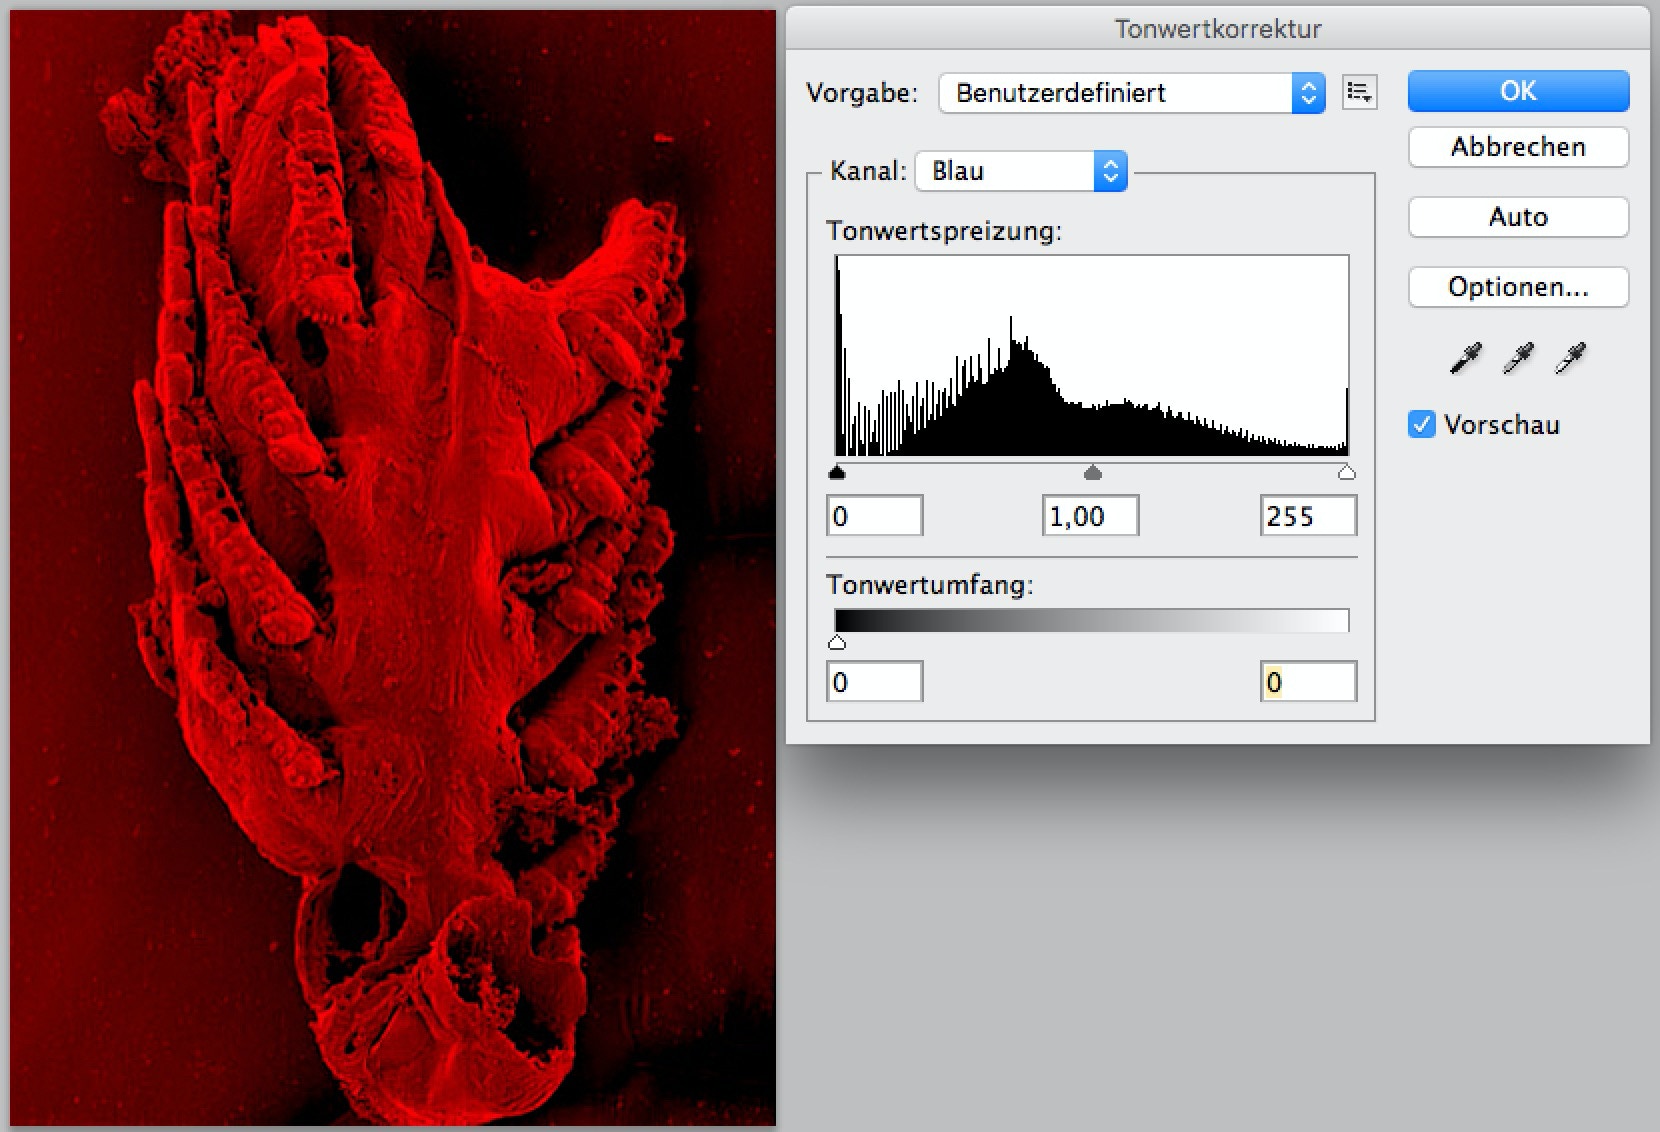
- 3. Open the left of the images, then, if not done already, turn each partial image into RGB mode to make them coloured = 24 bit (3X8 bit). Then open the tone correction tool (Apple or Cmd L on a Mac, most likely a similar short cut on a PC). The red one will be the future underlying one. Choose the channel scrollbar and wipe out green and then the blue by choosing the lower horizontal bar (not the one underneath the histogram). Just pull it to zero and you will see the effect, a red image.
- 4. Then choose the other (future right) image and, similarly, make it blue-green by wiping out red. The result is a green-blue image. Both images should then be tone-adjusted using the same tool and adjust black, middle and white level. That's most of the jobs done already. A tip: the background should be dark, because it lay disturb the stereo effect. I did this with the two images.
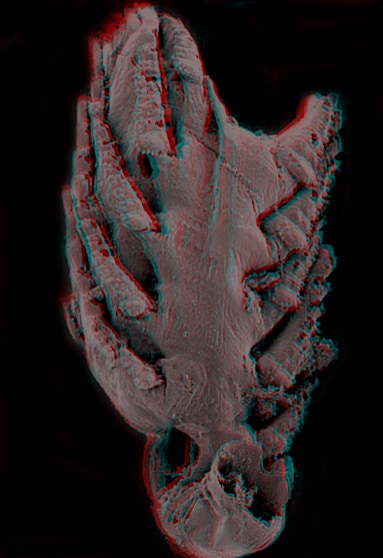
- 5. Pull the green-blue image on top of the red one (appears in an overlaying layer in Photoshop). Select the layer for the green image (by opening the layer window) and change to about 46 % opacity (100% is fully visible, 0% is invisible, and anything in between are degrees of transparency). I had to tilt the top image a little to get a better stereo effect. Then using the red-green-blue spectacles one has to click on the cursor buttons until the best result is reached. Now you can see both images in one. If they are too dark, use the tone correction again for each layer and adjust light and grey levels to you wishes. It is always better to use eraser tools to wipe out the surroundings of the specimen on the blue-green image and in most cases to darken the background around the specimen in red too (but see the phosphatocopine below).
After all is done you can adjust the image down to a suitable size and save it either in a PS file or the final tiff or jpeg. That's it. The first try (quick and dirty) should not take more than 5 minutes.
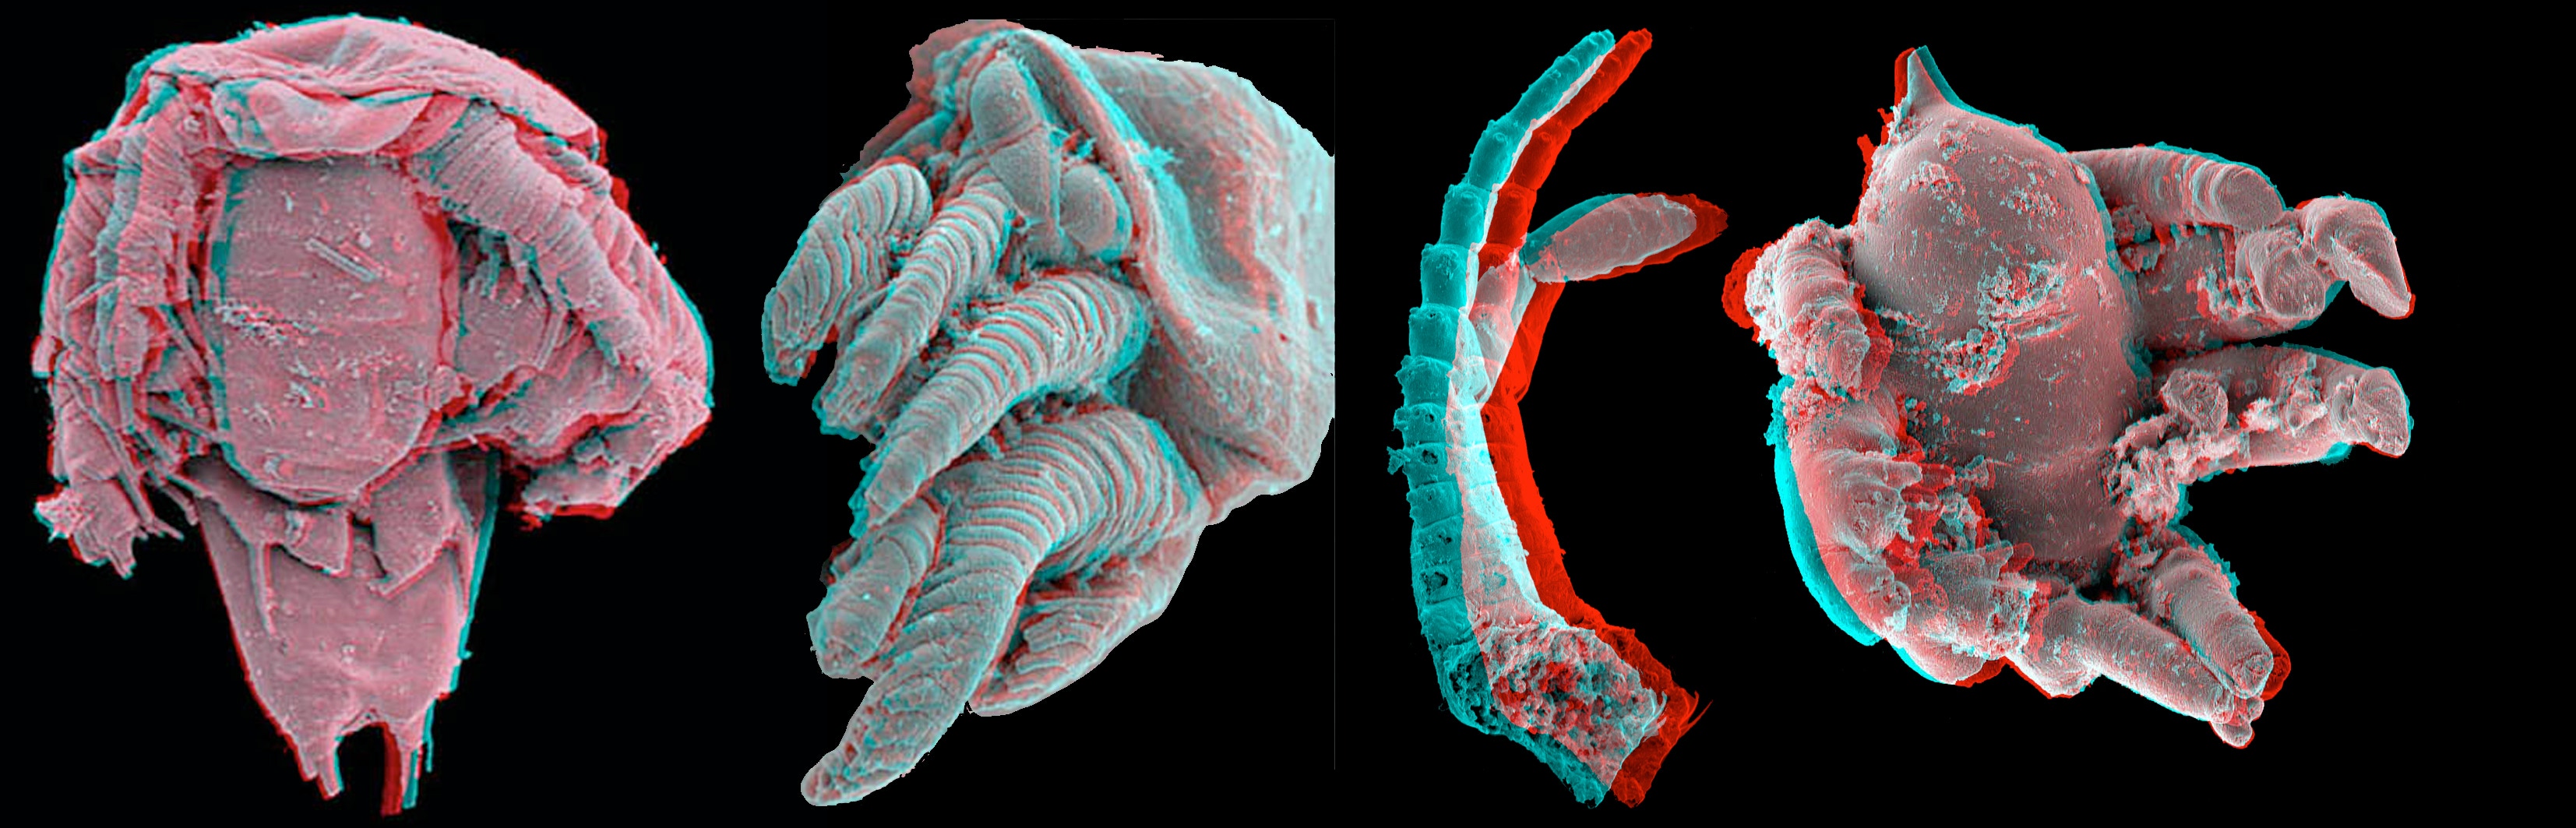
Example images: Enjoy this set of stereo images of some of our 500,000,000 years old fossils in 3D. All you need are red-green-blue spectacles; TV glasses are less useful since their red is too dark and green to light. You will see that not all specimens and views work well.
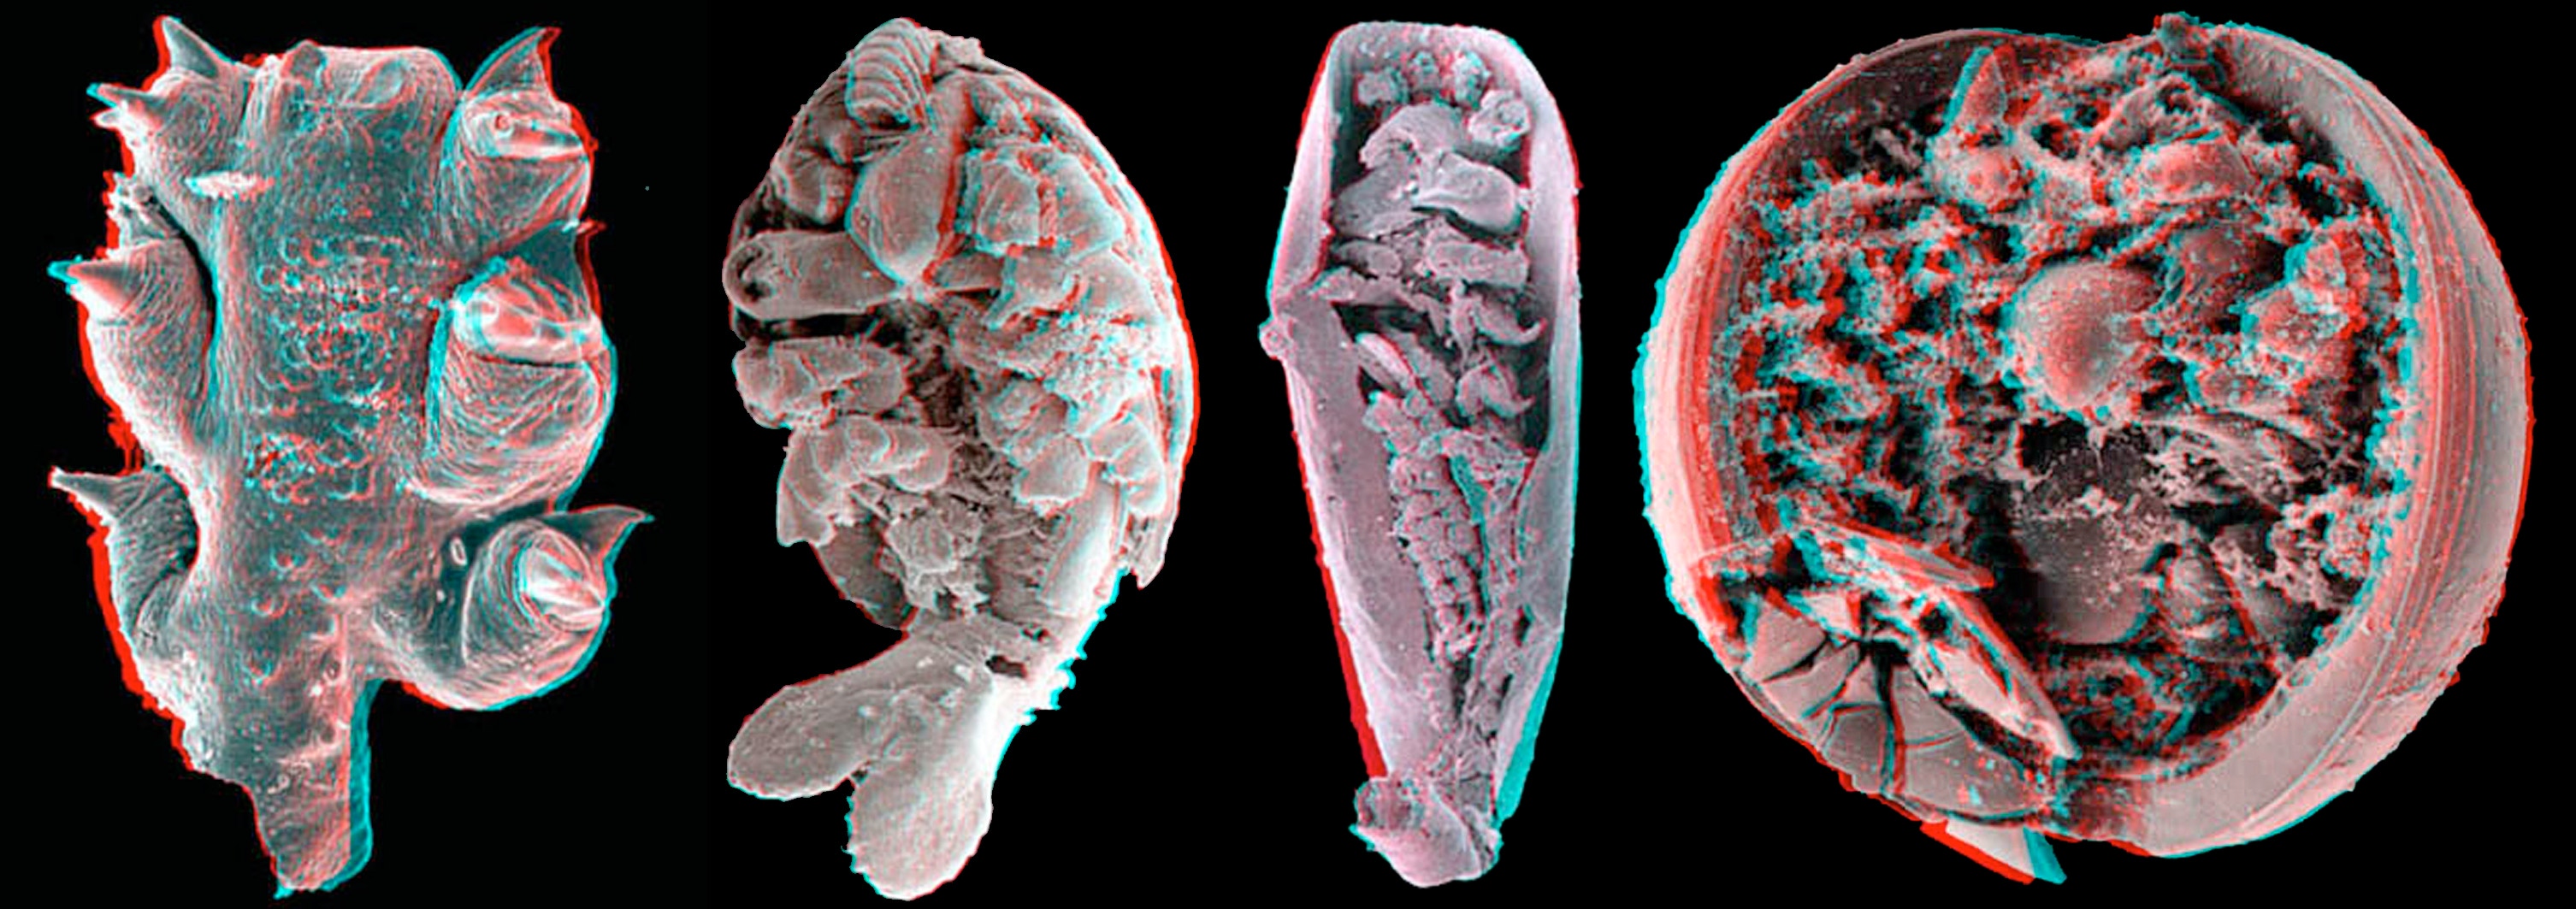
Water bear
Rehbachiella stage TS3 and TS2
LC phosphatocopine baby from UK
Bredocaris stage MN1 and head of adult
limb of Dala
earliest larva of Martinssonia
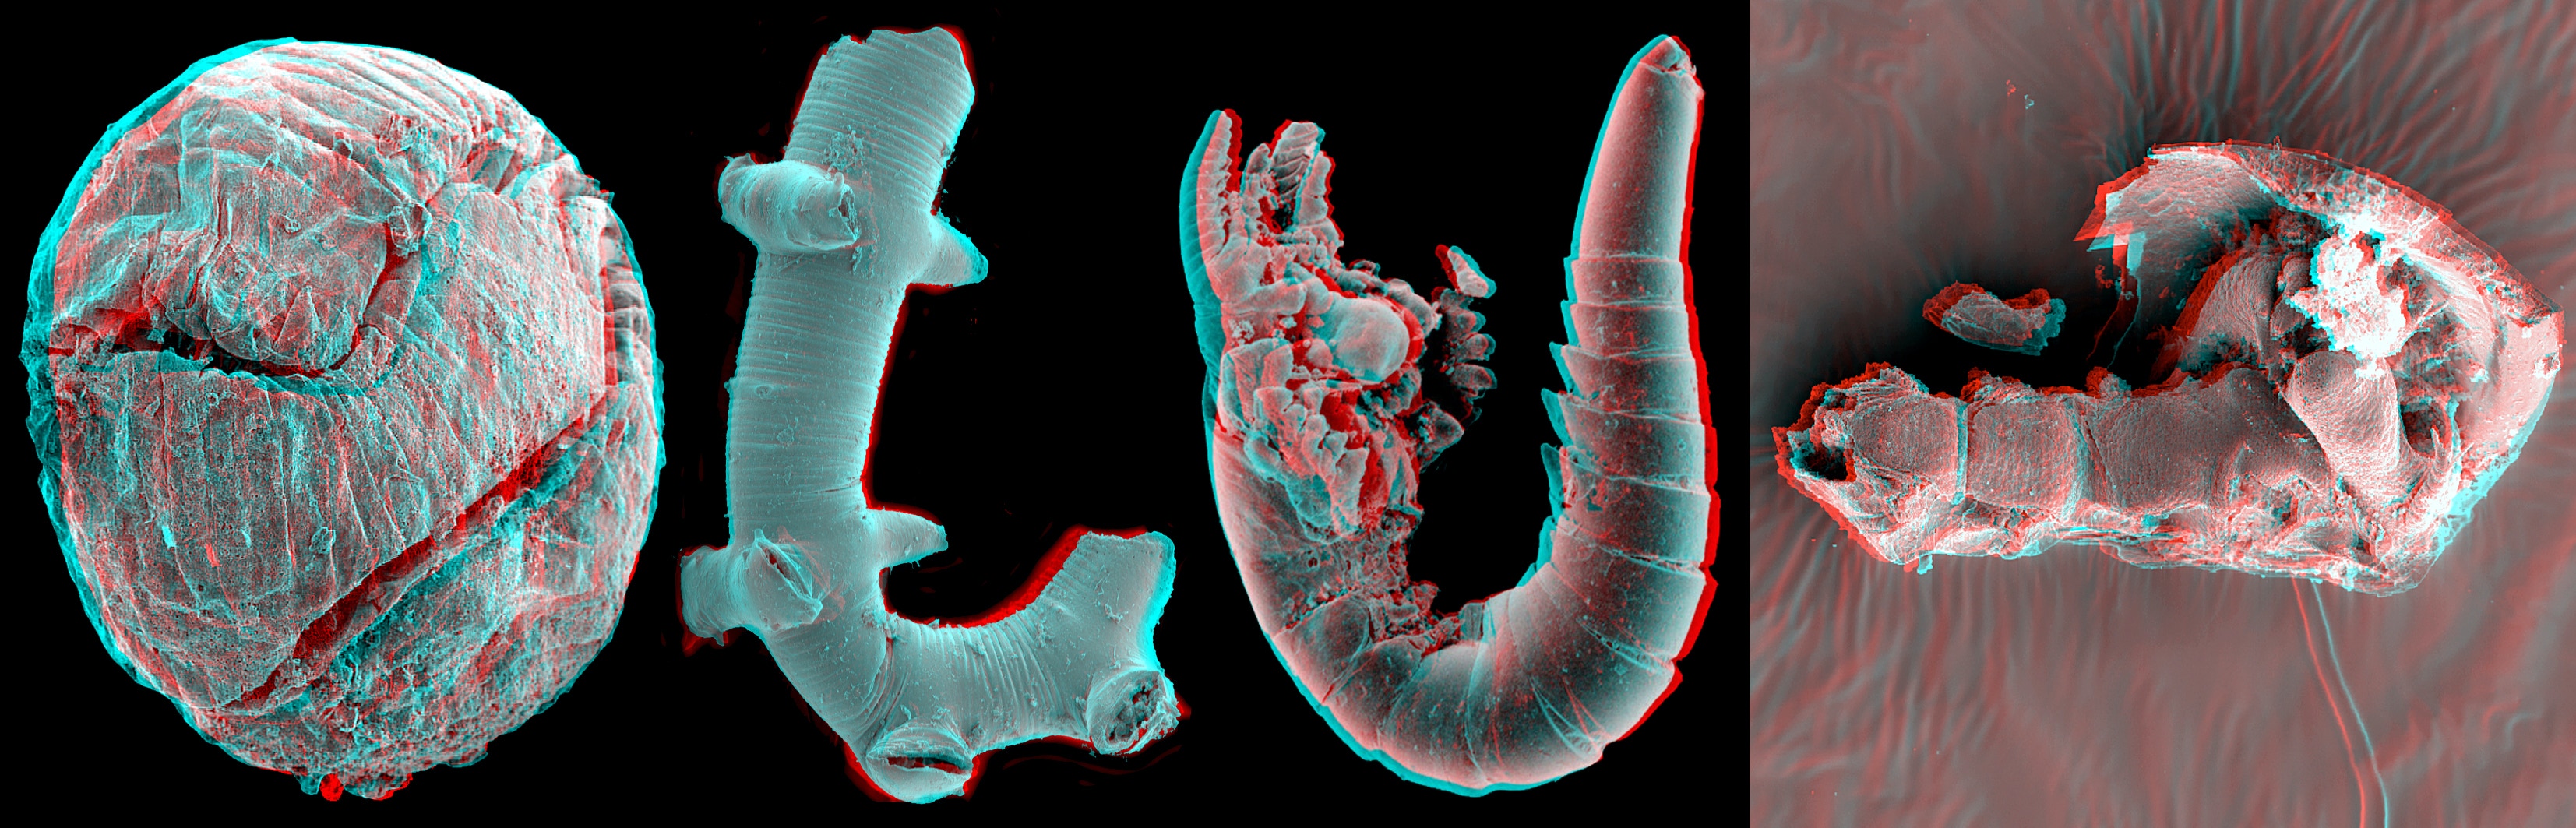
Markuelia embryo
Orstenotubulus
Skara minuta
phosphatocopine body
head to right with antennula
© 2020 CORE
